black and decker portable ac manual
Black & Decker Portable AC Manual: Comprehensive Guide
This comprehensive guide details the BLACKDECKER Smart Portable Air Conditioner (BPACT14HWT), offering insights from a price history spanning 2024-2026,
and consumer feedback.
Understanding Your Black & Decker Portable AC Unit
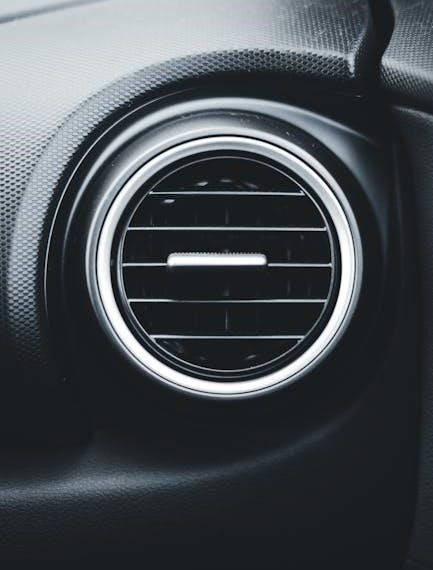
Your Black & Decker portable AC, specifically the BPACT14HWT model, is designed to cool rooms up to 700 square feet, utilizing 14,000 BTU (ASHRAE 128) or 10,000 BTU (DOE) cooling power. It also offers a heating function, providing 12,000 BTU of warmth. This unit features a “Follow Me” remote, adjusting temperature based on the remote’s location.
Consumer reports, as of April 7th, 2026, indicate a 4.1-star rating based on 5,540 ratings. While generally effective, some users have experienced issues with the unit failing to power on, potentially related to power supply or surge protector compatibility. Others report complete failure, suggesting possible compressor leaks. Understanding these potential issues is crucial for proper operation and troubleshooting.
Model Numbers and Specifications
The primary model discussed within this manual is the BLACKDECKER Smart Portable Air Conditioner, identified as BPACT14HWT. This unit boasts a cooling capacity of 14,000 BTU (ASHRAE 128 standard) and 10,000 BTU (DOE standard), suitable for spaces up to 700 sq. ft. It also provides 12,000 BTU of heating capability.
Current Amazon pricing (as of 04/07/2026) is $510.70, with a historical range from a low of $349.00 to a high of $771.31, averaging $526.81. Key features include a “Follow Me” remote control and smart functionality. The unit has received 5,540 ratings, averaging 4.1 stars. Variations like the BPP10WTB exist, but this manual focuses on the BPACT14HWT specifications and troubleshooting.
Safety Precautions and Warnings
Prior to operating your BLACKDECKER portable AC (BPACT14HWT), carefully review these safety guidelines. Always ensure the unit is plugged into a grounded outlet, avoiding multi-plugs if possible, as reported issues suggest potential power supply sensitivities. Regularly inspect the power cord for damage.
Never operate with a damaged cord or if the unit malfunctions – discontinue use immediately. Keep the intake and exhaust vents clear of obstructions to prevent overheating and compressor failure, as noted in user reports regarding potential leaks. Do not attempt to repair the unit yourself; contact qualified service personnel. Be mindful of the hot exhaust hose and avoid direct contact. Improper use voids the warranty and may pose a safety hazard.
Setting Up Your Portable AC
Proper setup is crucial for optimal performance of your BLACKDECKER BPACT14HWT. This involves carefully unboxing components, correctly installing the exhaust hose, and securing the window kit.
Unboxing and Component Checklist
Carefully unpack your BLACKDECKER BPACT14HWT portable air conditioner and verify all components are present. The box should contain the AC unit itself, the exhaust hose, the window kit (including adjustable panels), a remote control, and this user manual. Inspect each item for any shipping damage.
Confirm the presence of the following: AC unit, Exhaust hose (typically split into sections), Window kit (A, B, C panels and connector), Remote control (with batteries), Power cord, and User manual.
If any parts are missing or damaged, immediately contact BLACKDECKER customer support for assistance. Do not attempt to operate the unit with missing components. Retain the original packaging for potential returns or warranty claims. A thorough component check ensures a smooth setup process and optimal performance from the start.
Installing the Exhaust Hose
Proper exhaust hose installation is crucial for efficient operation of your BLACKDECKER BPACT14HWT. Begin by securely attaching one end of the exhaust hose to the designated port on the back of the AC unit. Ensure a snug fit, often requiring a clockwise twist to lock it into place.
Next, connect the other end of the hose to the window kit. The window kit consists of adjustable panels designed to fit various window sizes. Extend the panels to fill the window opening, creating a seal around the hose connection.
Secure the window kit firmly to prevent hot air from re-entering the room. A poorly sealed window kit significantly reduces cooling efficiency. Regularly check the hose for kinks or obstructions, as these can impede airflow and potentially damage the unit.
Window Kit Installation Guide
The BLACKDECKER BPACT14HWT window kit adapts to most standard windows. First, determine the appropriate window configuration – vertical or horizontal – based on your window type. Extend the side panels of the kit to securely fill the window opening, ensuring a tight seal to prevent outside air infiltration.
Carefully position the kit so the exhaust hose outlet aligns with the hose connection on your portable AC. Secure the kit using the provided brackets and screws, ensuring it’s stable and won’t shift during operation.
Proper sealing is vital; use foam strips (often included) to fill any gaps between the kit and the window frame. A compromised seal drastically reduces cooling performance. Regularly inspect the kit for stability and re-tighten screws as needed.

Operating Your Black & Decker Portable AC
The BPACT14HWT offers cooling and heating modes, controlled via a remote. Ensure proper setup, including the exhaust hose, before powering on for optimal performance.
Powering On and Basic Controls
Initial Startup: Before powering on your Black & Decker portable AC (model BPACT14HWT), confirm the exhaust hose is correctly installed and the unit is positioned according to the ‘Window Kit Installation Guide’. Plug the unit directly into a grounded outlet – avoid multi-plugs or extension cords, as these can cause power issues, as reported by some users.
Power Button & Mode Selection: The power button initiates operation. Utilize the ‘Mode’ button to cycle through cooling, heating (if applicable), and fan-only settings. The remote control mirrors these functions for convenient adjustment. The ‘Follow Me’ feature directs airflow based on the remote’s location.
Fan Speed & Temperature Adjustment: Adjust fan speed using the dedicated ‘Fan’ button, selecting from low, medium, or high. Temperature settings are controlled via the ‘+’ and ‘-’ buttons, displayed in Fahrenheit or Celsius (configurable in settings). Monitor the unit closely during initial operation to ensure proper functionality.
Cooling Mode Operation
Activating Cooling: After powering on, select ‘Cool’ mode using the ‘Mode’ button. Set your desired temperature using the ‘+’ and ‘-’ buttons; the BPACT14HWT offers cooling for rooms up to 700 sq. ft. Ensure the unit isn’t directly facing furniture, allowing for optimal airflow. Regularly check the air filter for obstructions, as a clogged filter reduces cooling efficiency.
Optimizing Performance: For best results, close windows and doors to maintain a consistent temperature. The ‘Follow Me’ remote feature enhances cooling by directing airflow towards the remote’s location. Monitor the exhaust hose for kinks or blockages, as these impede heat expulsion.
Troubleshooting Cooling Issues: If cooling is insufficient, verify the exhaust hose is properly sealed and the air intake isn’t obstructed. A compressor issue, indicated by running sounds but no cold air, may require professional servicing.
Heating Mode Operation (If Applicable)
Switching to Heat Mode: The BLACKDECKER BPACT14HWT model does include a heating function. To activate, press the ‘Mode’ button until ‘Heat’ is displayed. Utilize the ‘+’ and ‘-’ buttons to establish your preferred room temperature. Ensure adequate space around the unit for proper heat circulation, avoiding obstructions like curtains or furniture.

Safety Considerations: When operating in heat mode, maintain a safe distance from flammable materials. Regularly inspect the unit for any unusual noises or smells; The heating function is designed for supplemental warmth and may not rapidly heat large spaces;
Performance Notes: Similar to cooling, a clean air filter is crucial for efficient heating. Monitor the exhaust hose to confirm it remains unobstructed, allowing for proper ventilation during operation.
Troubleshooting Common Issues
Addressing typical problems like power failures, cooling inefficiencies, error codes, and exhaust hose concerns is vital for optimal BLACKDECKER AC performance and longevity.
Unit Not Turning On – Power Supply Checks
If your Black & Decker portable AC unit fails to power on, begin with fundamental power supply checks. Ensure the unit is securely plugged into a functioning electrical outlet. A common issue, as reported by users with the BPP10WTB model, involves multi-plug adapters; try plugging the AC directly into a wall outlet, preferably one with a surge protector. Verify the surge protector is active and functioning correctly.
Confirm the outlet itself is delivering power by testing it with another device. Inspect the power cord for any visible damage, such as cuts or fraying. If damage is present, do not attempt to use the unit and consult a qualified technician. Also, check the unit’s internal fuse (if accessible) for any signs of blowing. A blown fuse indicates a potential electrical issue requiring professional attention. Remember, attempting repairs yourself could void the warranty and pose a safety risk.
AC Not Cooling Effectively – Airflow and Filter Checks
If your Black & Decker portable AC isn’t cooling effectively, begin by assessing airflow. A primary concern is a blocked condenser coil intake – the area where exhaust originates. Ensure this intake is completely free of obstructions like dust, debris, or clothing. Simultaneously, verify the exhaust hose isn’t kinked or damaged, as restrictions impede proper ventilation.
Next, inspect the air filter. A clogged filter significantly reduces airflow and cooling performance. Remove and clean or replace the filter according to the maintenance schedule outlined in the manual. A dust-caked coil, as suggested in online discussions, also hinders efficiency. If the backside of the coil is heavily soiled, professional cleaning may be necessary; If airflow seems adequate and the exhaust hose is warm, a potential refrigerant leak might be the cause, requiring a qualified technician’s assessment.
Error Codes and Their Meanings
While a comprehensive list isn’t readily available without the specific model’s full manual, understanding potential error indicators is crucial. Online user reports suggest common issues manifesting as a complete lack of power, often resolved by bypassing multi-plugs and utilizing a dedicated outlet with surge protection. This indicates potential electrical overload sensitivity.
Further diagnostic information isn’t explicitly detailed in the provided data, but a failure to cool despite compressor operation (indicated by exhaust hose warmth) may signal a refrigerant leak – a repair best left to professionals. The absence of specific error codes highlights the importance of consulting the official Black & Decker documentation for your exact BPACT14HWT model. Regularly checking for firmware updates, if available, could also address unrecognized error states.
Exhaust Hose Issues and Solutions
Proper exhaust hose installation is vital for efficient operation. A key troubleshooting step, as indicated by user experiences, involves ensuring the exhaust hose isn’t obstructed. Reduced cooling performance can stem from a compromised exhaust pathway, preventing effective heat dissipation. Verify the hose is securely connected to both the unit and the window kit, avoiding kinks or bends that restrict airflow.
If the hose feels cool or lacks warmth during operation while the compressor is running, it suggests a potential internal issue, possibly a refrigerant leak, requiring professional attention. Regularly inspect the hose for damage, and ensure the window kit provides a tight seal to prevent hot air from re-entering the room. A poorly sealed window kit negates the cooling effect.

Maintenance and Care
Regular filter cleaning and coil maintenance are crucial for optimal performance and longevity of your Black & Decker portable AC unit.
Filter Cleaning and Replacement
Maintaining a clean air filter is paramount for efficient operation and air quality. Regularly inspect the filter – ideally every two weeks during peak usage – for dust and debris accumulation. A clogged filter restricts airflow, reducing cooling performance and potentially causing the unit to work harder, shortening its lifespan.
To clean the filter, gently remove it from its housing and vacuum it thoroughly. For more stubborn dirt, you can wash the filter with mild soap and water, ensuring it’s completely dry before reinstalling. Replacement filters are readily available; consult your model’s documentation for the correct filter type.
Depending on usage and air quality, filters typically need replacing every 3-6 months. Ignoring filter maintenance can lead to reduced cooling capacity, increased energy consumption, and potential compressor issues.
Coil Cleaning Procedures
The condenser coil, responsible for heat dissipation, requires periodic cleaning to maintain optimal performance. A dusty or dirty coil hinders heat exchange, reducing cooling efficiency. Before cleaning, always disconnect the unit from the power source.
Locate the condenser coil (the coil the exhaust comes from). Using a soft brush attachment on a vacuum cleaner, gently remove loose dust and debris. For more stubborn buildup, a commercially available coil cleaner can be used, following the manufacturer’s instructions carefully.
Ensure the coil is completely dry before reconnecting the unit. A “blanket of dust” on the coil, as noted in user reports, significantly impacts performance and may indicate a need for professional servicing if cleaning doesn’t resolve the issue.
Long-Term Storage Instructions

Preparing your Black & Decker portable AC for long-term storage is crucial for maintaining its functionality. Before storing, thoroughly clean the unit, including the filter and condenser coil, as detailed in previous sections. Drain all remaining water from the internal tank to prevent mold and mildew growth.
Detach the exhaust hose and window kit, storing them in a dry location. Ensure the unit is completely dry before covering it with a plastic bag or sheet to protect it from dust. Store the AC in a cool, dry place, away from direct sunlight and extreme temperatures.
Periodically check the stored unit for any signs of damage or moisture buildup.

Price History and Consumer Feedback (as of 04/07/2026)
Analyzing Amazon data reveals the BLACKDECKER BPACT14HWT currently costs $510.70, with a price range from $349.00 to $771.31, and a 4.1-star rating.
Amazon Price Tracker Data – BPACT14HWT

Here’s a detailed breakdown of the BLACKDECKER Smart Portable Air Conditioner (BPACT14HWT) price fluctuations on Amazon, as tracked by GOSH Price Tracker. In April 2025, the price ranged from $484.80 to $538.92. March 2025 saw prices between $399.99 and $492.29. February 2025 remained relatively stable, at $474.01 to $480.52. December 2024 experienced a significant low of $349.00, peaking at $599.00.
November 2024’s range was $461.06 to $591.53, while August 2024 saw prices from $399.99 to $543.33. June and May 2024 both held steady at $459.99 to $489.99. April 2024 ranged from $487.37 to $591.45, and March 2024 from $497.27 to $599.00. February and January 2024 both peaked at $769.81, starting at $599.00. This data provides a clear picture of price volatility.
Common Consumer Complaints & Reported Issues
Consumer feedback reveals recurring issues with the BLACKDECKER BPACT14HWT portable AC. A frequent complaint centers around the unit failing to power on, often resolved by bypassing multi-plugs and utilizing a surge protector. Several users express strong dissatisfaction with the brand overall, citing a pattern of poor product reliability and advising against purchasing Black & Decker appliances.
Reports indicate a common problem where the unit stops functioning after a period of use, mirroring experiences with the BPP10WTB model. A concerning issue involves a potential compressor failure, indicated by continued operation despite ineffective cooling; this often suggests a refrigerant leak requiring professional repair. Some users report the unit failing entirely after a short operational period, highlighting potential quality control concerns.